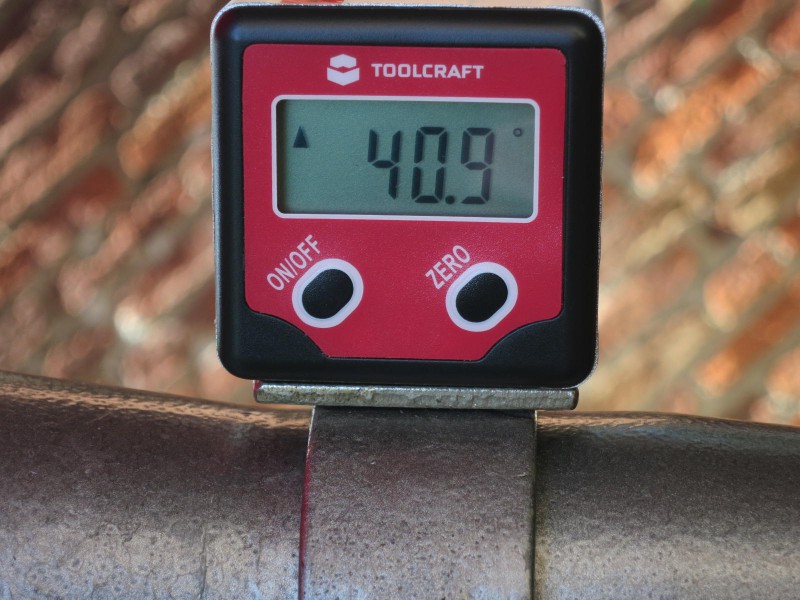
Mercury, Mars and Saturn 2016 Feb 25. Saturn is very poor and hardly visible.
Viewing daylight stars
Videoclip of Mizar, Cor Caroli and Arcturus 2015 Jun 15.
Setting up equatorial mount
Viewing daylight stars on 2015 Feb 14.
Set up equatorial mount in daytime
Videoclip of setting up an equatorial mount in daylight 2014 Feb 27.
Stars at daytime
Videoclip of observing Capella and Betelgeuse at daytime with a 25cm Dobson 2011 March 27.
Objects at daytime with 40cm Dobson 2014 Jun 14
Mars, Mizar and Cor Caroli at daytime with 40cm Dobson 2014 Jun 14.
Another time stars at daytime
Another videoclip of observing more objects at daytime (altitude Sun = 10°) with a 25cm Dobson 2012 April 29.
Introduction
Normally we can only see stars at night. The reason is obvious: with daylight the sky background is too bright to see the stars, the relatively faint points are washed out by the scattered sunlight. For us, the Sun appears 550000 times as bright as the next bright object: the full moon and even 1e10 (ten billion) times as bright as Sirius the brightest star in the sky. Even stories such as 'from deep pits or mine shafts it is easier to find stars on the smaller portion of the sky' are incorrect: one is 'blinded' even by the small portion of sky one sees just like one sees normally a large part of the sky.
But there is yet a possibility to see the stars at daylight. It has no scientific value but it is just a challenge until how faint one with a certain telescope (or even with the naked eye!) one can see astronomical objects in daylight. It can be fun when seeing Sirius or Betelgeuse on a hot North American or European summer day with the telescope ! It is even possible to see double stars at daylight (e.g. Mizar, Cor Caroli, Alpha Centauri). For viewing first magnitude stars a small telescope and a power op 20x is required. It is also fun when showing it to friends, etc. My experience is that people are very amazed seeing a star or planet in bright daylight.
Why ?
Well, some planets, particularly Mercury, are better visible in daylight as it is too close to the Sun to be viewed at night. But, in most cases just the fun or having the kick of seeing a star or planet in full daylight. Or on far northern locations such as Northern Europe have very long daylight in summer resulting in getting dark when people go to bed or even later. Viewing objects at daylight allows using telescopes and seeing some astronomical objects despite lack of a real night sky.
Alignment of the telescope should be done with objects currently visible to the naked eye. In nighttime this is no problem but in daytime there are only a very few naked eye objects available (in many cases only the Sun). In the latter case the telescope should be pointed at the Sun for alignment. This can be done safely when the requirements in the yellow box below are met.
It is important that these conditions are met:
Sky should be sufficiently clear, about the background color of this page. Hazy or milky skies with lots of dust attracting moisture or much cirrus cloud covered skies are useless unless one wants to look up Venus or the Moon. Dry and high altitude locations are the best areas like Utah, Atacama desert, Namibia, and the very best is the for the most of us inaccessible Dome C in Antarctica. But your home location can be suitable at times when the sky looks like the background color of this page. It seems contrary, but even in humid tropical environments like Indonesia, particularly during the rainy season between showers or on a clear day the skies are usually deep blue, better than in the dry season. Clear nights also show many stars in dark areas in such locations.
Telescope should be properly aligned with an error no more than half a degree.
Eyepiece should be prefocused properly in focus for infinity for a relaxed eye. Do this by pointing the telescope at a remote object (more than several hunderds of meters away, or better, a bright object such as the Moon or Venus, or possibly an overflying airliner). Otherwise you'll be peering into the blue void without seeing anything ! You can put a marker on the focusing barrel.
Keep the telescope tube, particularly when painted with a dark color, outside direct sunlight. Heating up the telescope tube will generate turbulence inside which results in a badly blurred image.
Unless you have a goto mount you must know the coordinates of the object(s) to be found. Currently most smartphones or laptops can run programs which show these coordinates. Smartphone applications such as Skysafari for iOS and Android, Starmap for the iPhone or iPad, Palm Planetarium for the older PalmOS (for which is emulation on Android, iOS and Symbian) are star charting programs which display the altitude of the selected object and refresh automatically.
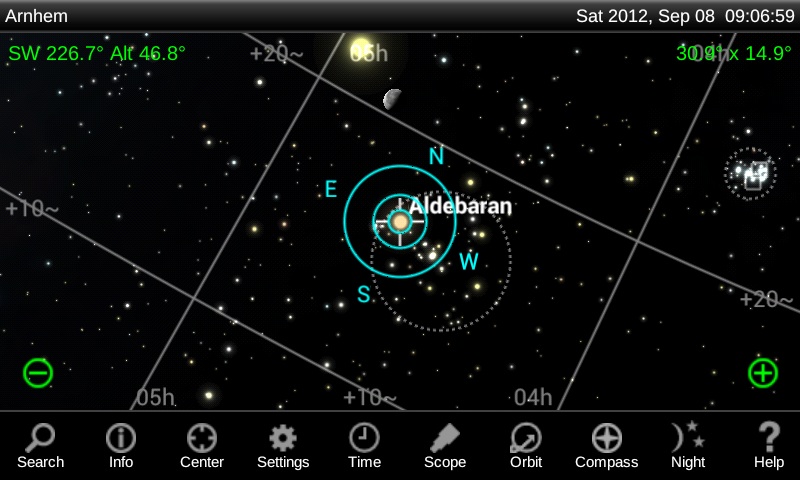
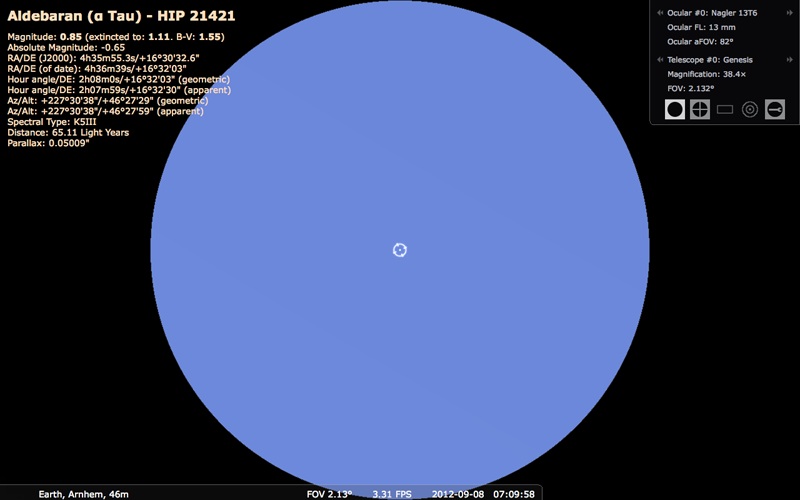
For example, below examples of Skysafari (Mac OSX, iOS and Android, $3) which shows the altazimuth coordinates of the object centered on and are refreshed constantly. Stellarium is a freeware app for Mac OSX, Linux and Windows. Although designed for 'normal' night use these apps are an excellent helper for finding objects in the daytime.
It is easy with apps such as Skysafari and Stellarium (also available on iOS and Android, $2): search for the object with the app's search function and center the object and on top left of the screen the altazimuth coordinates are shown. See the images below (click to enlarge).
How to find Aldebaran with Skysafari
How to find Aldebaran with Stellarium (ocular plugin)
Otherwise you can obtain other sky charting or ephemeris apps them from several internet sites.
Equatorial mount For equatorial mount, you need the hour angle and the declination of the object.
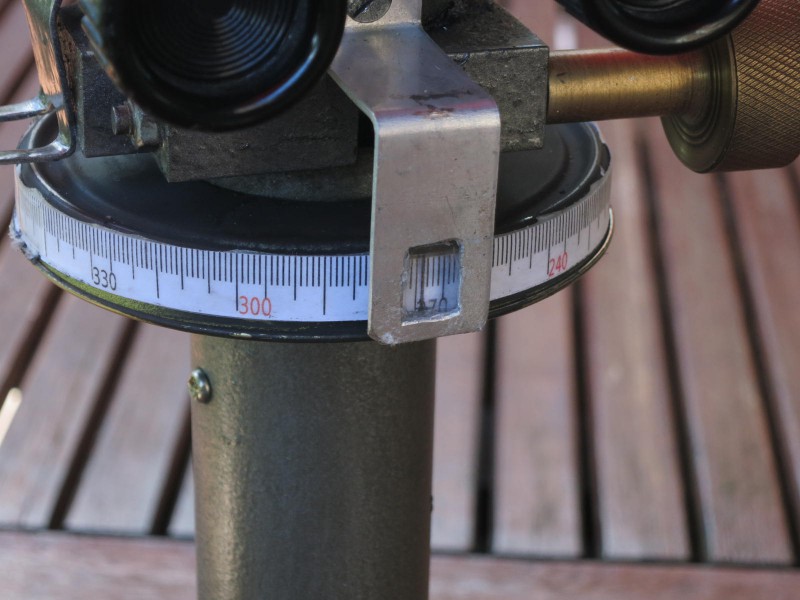
furthermore, the mount should be properly aligned. You need a compass for rough celestial pole direction and an inclinometer to set the polar axis correctly.
Point the horizontal part of the mount in the direction of the compass (north in the northern hemisphere and south in the southern). Exactly level is not required, but only roughly (a few degrees off level) is OK, unless the polar altitude is already exactly pre-configured, e.g. for astrophotography. In the first case (polar altitude is not exactly aligned), put the inclinometer on the polar axis and it should read an angle equal to your latitude.
As the eye pupil dilates to only 2-3mm in the daytime, the minimum power required to use the full aperture of the telescope is aperture / 2 till 3 mm which means a 10cm telesope requires at least 35-50x power. Using 20x which is OK at night but at daytime it 'degrades' a 10cm telescope to a small 5cm one and stars are only 25% of brightness which means 1.5 magnitude loss compared to 50 or more times power. A 20cm telesope requires at least 80x for the same reason otherwise its performance is degraded. So the rule is (also applies during 'normal' night operation) aperture is the smallest value of real aperture and power times eye pupil dilation. The latter is 5-7mm at night and 2-3mm in the daytime. This also means that 15x70 binoculars perform actually the same as 15x35 in the daytime and 10x50 as 10x25, assuming the same optcal quality. This makes binoculars unsuitable for stars at daylight unless you look for Jupiter, or, close to sunrise/set, a 1st magnitude star. When using a Newtonian or Dobson telescope, put the telescope in the shadow as when setup in sunlight, turbulence in the telescope tube will cause much turbulence degrading image quality considerably. Refractors don't have this problem or at most that it does not deteriorate image quality.
The best choice is an ultrawide eyepiece (like for deep-sky observing) such as a 15-25mm eyepiece with an angle of 82° such as the Naglers. Otherwise find first brighter objects (> +0.5 mag) with a low power one with an actual FOV of at least 2 degrees, which possibly degrades the aperture. For finding fainter objects or objects close to the Sun you can better use an eyepice with a higher power (but a smaller FOV) which uses the best of th aperture. E.g looking up Arcturus with a 25mm with an apparent FOV of 50° has an actual FOV of 2°, with a 10cm f/5 scope shows the star rather dim and then barlowing the eyepiece considerably brightens the star image, as in the latter case you make full use of the aperture and in the first case the aperture is smaller due to the too large exit pupil. Limiting magnitude is for the naked eye in full daylight about -4 and for a 10cm telescope with at least 40x power about +1 for 'standalone' objects and about +2...+3 for objects nearby another (brighter) object because it is easier to find. This is valid for high sun (> 45º altitude). For low Sun (e.g. 10º) the limiting magnitudes are about 1-2 magnitude fainter. Every 1.6x larger diameter (and magnification) increases the limiting magnitude by 1.
Seeing issues: When the seeing is very poor, this will degrade visibility of stars in the daytime as the twinkling of the star image is blurred out which is particularly the case when using higher powers (40x or more) and on hot days. In the daytime the seeing is poorer than at night but usually this is not an issue when using powers up till 50x.
Putting the telescope in the shade makes observing of daylight objects more comfortable, particularly on a hot summer day. Moreover there will be less turbulence in the (mostly Newtonian) telescope which degrades image quality considerably even more than bad seeing.
Requirements
What do you actually see ?
Depends on the object.
Mercury - Between superior conjunction and greatest eastern or western elongation, rather bright. In that case, it can be seen even as close as 7° from the Sun . Phases can be seen. When it is between inferior conjunction and greatest elongation it is harder to see as it is fainter.
Venus - Looks very bright and when close to inferior conjunction, it has a nice thin crescent and can be even seen on the day itself of the inferior conjunction in many cases.
Earth - Look around you, all that belongs to Earth, no telescope needed.
Mars - Even when it is only as small as 10" and at more than 90° elongation, telescopes of 20cm or more reveal many details when ths Sun is low. Even small telescopes of 8cm will show some detail. The reddish appearance has a good contrast to the blue background.
Jupiter - Easy target, details visibility same as for Mars. When closer to the Sun (even as close as 20 degrees) the two belts can be seen in a transparent sky. A 20cm or larger telescope will show the Galilean moons when the Sun is low and Jupiter is not too close to the Sun.
Saturn - Harder to see due to the larger distance to the Sun and hence its lower surface brightness. But when transparent sky and Sun not too high, a small telescope of 8cm will show it.
Uranus / Neptune - Sorry, no go. Unless, in the case of Uranus, with low Sun and a (much) brighter object is close to it which will help to find the +6 planet, but a larger telescope (20cm or more) is required.
Bright stars - Stars brighter than +1 are all accessible with a small telescope (7-8cm) even with high Sun as long as the star is at least 30 degrees from the Sun. With low Sun and further from the Sun (90° or more), an 8cm can show stars until at least +2, but that is a real challenge. Sometimes one sees the star to be found and it turns out it is easier to be seen than expected after peering into the blue void. Stars with an orangish color such as Betelgeuse or Arcturus are a bit in favor due to the color contrasting to the blue sky.A larger telescope (20cm or more) and at least 75x power will show magnitude 2 stars with high Sun and mag 4 stars with low Sun.
Double stars - There are a lot. The easiest ones are Alpha Centauri and Alpha Crucis, even visible at full daylight. Other easy examples are: Mu Bootis (4" separated, about +3 and +4), Porrima (+3.5, 2" separated) and Mizar. The latter are components of +2.4 and 4.0 14" apart, easy to be seen at low power. Nice object in daylight with low Sun. Other challenges: Albireo with a mv=+5 component and Cor Caroli with a +5.6 component. Visible in a 10cm with at least 40x power with low Sun.
Deep sky objects - No way. Needs a real night sky.
It is just the challenge 'how far can I go with my telescope'. The image below gives an impression of what you can actually see. The term 'naked eye' means without optical device other than ordinary eyeglasses or contact lenses.
Setting up
There are more methods to view in daytime. These are:
GOTO mount, the easiest way. When you have a telescope with a Goto mount which usually has a tracking clock drive as well (if aligned properly), you are lucky. Some portable mounts allow two-star alignment which you can align on the Sun (watch out, do not look into the eyepiece !) and the Moon (or Venus, one of them should be available in the sky). Just type in the object name (or coordinates if there is no object database in it) and go. However, some goto mounts do not allow pointing it to the Sun, so in that case setting up on a clear night before must be done.
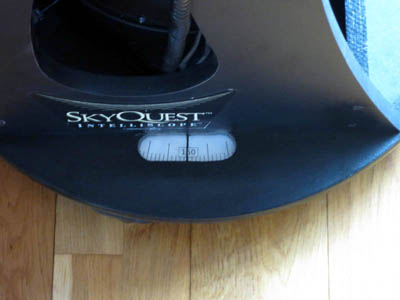
Orion Intelliscope: (models XT-6/8/10/12 and XX-12/14/16) with the PushTo handcontroller: setup can be done, using the altitude and azimuth diagnostics mode, as follows:
Vertical stop adjustment (which is also required for 'normal' night use) should be ok. Refer to the user manual how to do this.
Have azimuthal coordinates ready, see above how to get them.
Put a 15-25mm wide field eyepiece in the telescope (a Nagler or an UWA/SWA is best but the supplied Orion Sirius 25mm is OK) and focus properly on a distant (>few hundred meters away) object or better the Moon if available. You can also set a marker by a CD writing pen or a sticker on the focusing barrel to remember it for later use.
The base of the telescope should be perfectly level as well, as the azimuth and altitude relative to the base should match with true local azimuth and altitude. One or two tapered wooden strips to put under the feet ca do this.
Get the current azimuthal coordinates of a bright object in the sky (e.g. Moon, Venus or when no object is available even the Sun). Point the scope to that object without using the intelliscope. When it is the Sun, see the yellow box above. .
Now grab the handset, press and hold enter and press 'on' and release enter. You'll see 'ALT AZ TEST'. Press Enter. Now you will see lots of number in the tightmost column +000.0 and +000.0 above each other. The top number is the altitude and the bottom number the azimuth. Note that azimuth is, unlike what is standard, counterclockwise. Now lower the telescope until it is level. The top right number should be within 0.5 degrees from the given altitude of the Sun with a minus sign, e.g. -023.5. If not, repeat the level alignment or it is too long ago (> 2 minutes) you calculated the coordinates of the Sun. Recalculate. Rotate the scope until the bottom right numbers read the given azimuth of the Sun without minus sign. Now the telescope points to the north point of the horizon. Turn off and on (the latter with enter held down) the handset and you'll see +000.0 and +000.0 again. When you used the Sun for alignment you can remove the shield.
Now you are ready.
Decide which bright planet / star you want to find. Recalculate the horizontal coordinates (with the javascript site mentioneed above) and you can rotate the scope until you see the proper altitude + negated azimuth (e.g. 45° should be -045.0 on the handset's display. Look into the eyepiece and you must find the star.
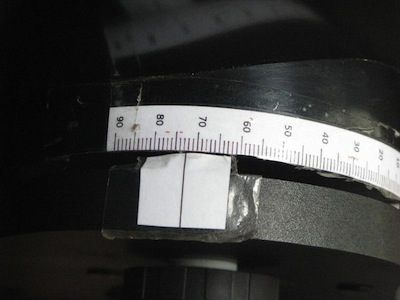
DIY setting circles on Dobson. When you make setting circles on a Dobson you can use the abovementioned XT10i method with any Dobson (or other altazimuth mounted scope) without handcontroller. Just a smartphone or other handheld device showing 'live' altazimuth coordinates suffices. I made them by making the circles with a vector graphics drawing program like Inkscape and then printing the drawings. You can also make them with a pen and ruler, as long as the accuracy is at least 0.5 degrees.
This is how I made my setting circles on the XT-10i.
I made an adjustable aluminum ring with a degree scale on it which can be preset on the azimuth of an alignment object (Sun or Moon). The telescope should be exactly level. Then alignment can be done of presetting the azimuth ring to the correct azimuth of the alignment object.
Another manual to make setting circles can be found
here. See also this Cloudynights discussion.
Setting circles equatorial mount. Such a device requires that you know the equatorial coordinates of an object. See above for more. The telescope should be pole-aligned properly. This can be done the night before or by aligning them on easily visible objects as the Moon, Venus or when these are not avaiable , the Sun (safety !).
When you have a carpenter's level indicator (available for a few dollars in the local hardware shop), it is even possible to use the zenith as an alignment point. For more info see this page.
Nearby bright object. This can be the Moon or Venus, e.g. during a conjunction at the daytime. When you know the location of the object relative to the Moon, it can be found that way.
Steady telescope method. This method is useful for binoculars as well and requires no goto mount or setting circles. Find on a clear night an object with the same (+/- ½ °) declination and point the telescope at it. Calculate the difference in right ascensions and add this to the current time. E.g. to find Sirius (RA 6:45:09 and declination 16°43') take the star ι Cap as 'guide star'. The coordinates are RA:21:22:15, Dec: -16° 50'. Then the coordinates of the latter must be subtracted from that of Sirius: 6:45:09 - 21:22:15 (+24:00:00 as the latter is larger) = 9:23 hours. This difference should be multiplied by 23:56 / 24:00 (sidereal day) : each 24 hours the sidereal time is four minutes more ahead of the clock time. So this makes 9/24 * 4 =~ 1.5 minute less which results in about 9:22 hours to add. Note that time (add 9:22 hours to current time). As a rule of thumb, subtract 1 minute from the difference for each 6 hours of difference between observation of 'guide star' and star to be found. Make a note of that calculated sidereal time.
Now let the telescope stand at that location (or put a marker on the ground to put it back later). At the noted time Sirius should be in the field. It is even easier to use a terrestal object (e.g. tree top, roof corner) and find a spot to deploy the telescope where the 'guide star' is just positioned close to that object. Note the location and (sidereal) time where/when Sirius is to be found there.
In most cases particularly when more than 30° from the Sun easily to be found
Jupiter
Naked eye
With very clear sky, shortly (< 2-3 months) before opposition after sunrise or after opposition before sunset when not too low in the sky one might find Jupiter after looking it up with binoculars.
Easy to be found, even as close as 7 ° from the Sun under very clear conditions and at least 50mm diameter (CAUTION DO NOT POINT AT THE SUN !!) such as close to an inferior conjunction.
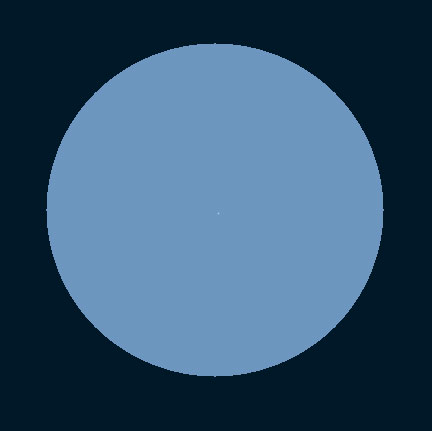
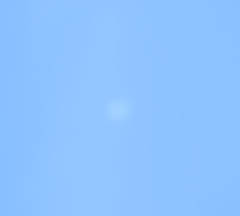
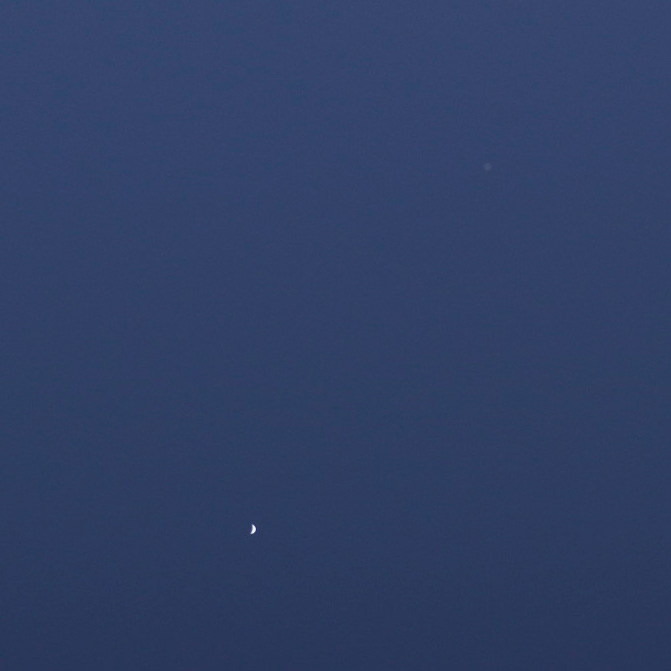
Click on one of the links below to see what a 10 cm telescope will show in a clear daylight sky about 90 degrees or more from the Sun at a power of 30x (unless stated otherwise).
Viewed with 10cm telescope, 40° from Sun, actually it appears brighter due to the fact that the dynamic range of the human eye is much greater than this computer screen.
Note: Planetary objects may appear larger in the telescope because the apparent field diameter of the eyepiece's is 50-60°, much larger than the angular diameter of the blue circle on this computer screen from reading distance. Stellar images may appear brighter if you are using a 20cm telescope or larger and a power of more than 50x.
My own experiences
Here some exceptional observations of daytime objects which I did in the past 30 years. From Holland unless stated otherwise.
Venus and Jupiter taken with Canon EOS 6d in prime focus of ED 110, close conjunction less than half a degree apart 2015 Jul 1 late afternoon in full daylight.
ED110, 59x power, very clear sky, but turbulent (bad seeing) air
Pollux clearly visible, Castor (15 ° from Sun) somewhat more difficult, but even its companion (+2.9) was visible. Record for me after the Fomalhaut sighting on 2016 Feb 22, 20 degrees from Sun. Moreover Mercury (23° from the Sun) was like a gibbous Moon.
Jupiters Great Red Spot in daylight
2018 Feb 19 9:00 local time (Parkes, NSW)
ED110 59x and 128x
The first time I saw the GRS by daylight.
Mercury, Venus and Jupiter
2016 Aug 20
80mm, 40x power
Mercury as a crescent
Regulus (+1.3) 12 degrees from Sun
2016 Aug 10
ED110, 59x power
Barely visible
Mercury and Venus, 11 degrees from the Sun
2016 Jul 17
80mm, 40x power
Close conjuntion about half a degree apart. Mercury was -0.5, almost full, easily found
Procyon (+0.5) 17 degrees from Sun
2016 Jul 14
With ED110 32x power
Observed just at noon
Mercury (-1.5), 5 degrees from Sun
2016 Jul 10
With 80mm 40x power, done with care due to proximity of the Sun NOTE: This is a very risky observation so close to the Sun !
Morning Sun about 30º above horizon. Stars : Spica, Antares near zenith, Alpha Centauri and Alpha Crucis both as double stars. Saturn appeared clearer than with 25cm Dob at home in daylight
Jupiter moons Io, Europe and Ganymede
and Pleiades stars Alcyone, Maya, Atlas and Pleione
Midday 10:30 UTC only 17º from the Sun but very transparent sky
Venus
2012 Jun 10
10cm Genesis
Midday 4.5 day after inferior conjunction only 5° separated. Filmed with Canon Powershot S100 behind eyepiece and stacked.
Jupiter
2012 May 26
10cm Genesis
Only 9.5° from the Sun as a very dim ball ! Filmed with Canon Powershot S100 behind eyepiece and stacked.
Four planets
2011 May 25 morning
10cm Genesis + Nagler 13T6
Alt Sun 40°, sky very blue, Mars (+1.4) close to Venus barely visible, Mercury and Jupiter easily visible
Several stars
2011 May 25 afternoon
10cm Genesis + Nagler 13T6
Alt Sun 40°, sky very blue, Several 1st mag stars, and all seven bright stars of the Big Dipper, including the +3.3 Megrez, the latter with Nagler 13mm + Barlow, With the barlowed 13mm I saw even Cor Caroli B (+5.5) !
Alpha Centauri was easily visible as a double star in 1995 but in 2012 I needed much higher power (83x) to separate it with the Genesis, due to its orbit and reaching periastron in 2015.
For more info or if you have done a special observation you can mail me.


![[!]](danger.gif)